
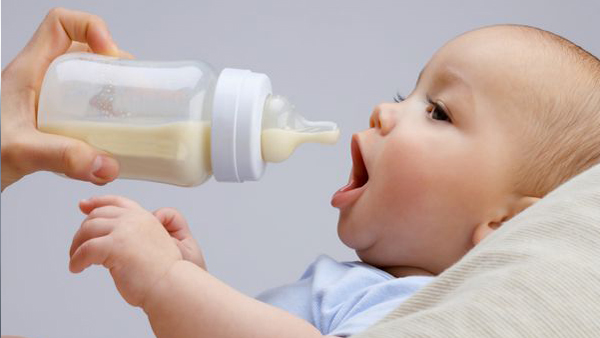
How to Clean Your Baby’s Bottle: A Complete Guide for Dubai Parents
Few aspects of infant care are as important—and as frequently performed—as cleaning baby bottles. Whether you’re exclusively bottle-feeding or combining bottles with breastfeeding, proper bottle hygiene is essential for protecting your baby’s health. At myPediaClinic in Dubai, Dr. Medhat Abu-Shaaban and our pediatric team frequently advise parents on best practices for bottle cleaning and sterilization.
Your baby’s immune system is still developing during the first year of life, making them more vulnerable to infections from bacteria and other harmful microorganisms. Improperly cleaned bottles can harbor these pathogens, potentially leading to digestive upset, diarrhea, or more serious infections. The good news is that with the right techniques and consistent habits, keeping your baby’s bottles clean is straightforward and manageable, even with a busy schedule.
In this comprehensive guide, we’ll walk you through everything you need to know about cleaning baby bottles, from daily washing routines to sterilization methods, special considerations for Dubai’s climate, and answers to the most common questions parents ask. Whether you’re a first-time parent preparing for your baby’s arrival or an experienced parent looking to ensure you’re following current best practices, this guide will provide the information you need.
Why Proper Bottle Cleaning Matters
Before diving into the “how,” it’s important to understand the “why” behind thorough bottle cleaning. Milk—whether formula or breast milk—provides an ideal environment for bacterial growth. When milk residue remains in a bottle, nipple, or ring, bacteria can multiply rapidly, especially in warm conditions like those commonly found in Dubai.
Babies are particularly vulnerable to infections from bacteria like E. coli, Salmonella, and Cronobacter because their immune systems haven’t fully matured. These bacteria can cause anything from minor stomach upset to serious, potentially life-threatening infections. Proper bottle cleaning significantly reduces this risk.
Additionally, formula residue and milk fat can build up in bottles, nipples, and other feeding equipment over time. This buildup can affect the taste and quality of your baby’s milk and make the equipment deteriorate faster. Regular, thorough cleaning prevents this accumulation and keeps your bottles in good condition longer.
Dr. Medhat Abu-Shaaban at myPediaClinic emphasizes that while it’s important to be thorough about bottle hygiene, parents shouldn’t become overly anxious about sterilization. The goal is to establish good, consistent cleaning habits that protect your baby without creating unnecessary stress or taking excessive time.
Essential Supplies for Bottle Cleaning
Having the right supplies makes bottle cleaning easier and more effective. Here’s what you’ll need:
A dedicated bottle brush: This is non-negotiable. You need a brush specifically designed for cleaning baby bottles, with bristles that can reach all the way to the bottom of the bottle and scrub the sides effectively. Look for brushes with sturdy bristles that won’t fall out easily. Many bottle brushes come with a smaller brush attached for cleaning nipples.
Nipple brush: If your bottle brush doesn’t include one, get a separate small brush for cleaning inside nipples. These tiny brushes can reach into the nipple opening to remove milk residue that can clog the holes.
Dish soap: Use a mild dish soap that’s free from harsh chemicals and strong fragrances. Some parents prefer baby-specific bottle soaps, but regular dish soap is fine as long as you rinse thoroughly. At myPediaClinic, we advise choosing fragrance-free options when possible to avoid any potential irritation.
Drying rack: A clean drying rack designated specifically for baby bottles and feeding equipment is essential. Look for racks designed for bottles that allow air to circulate around all parts of the bottle and keep nipples and other small parts organized and elevated off surfaces.
Sterilizing equipment (if using): Depending on your chosen sterilization method, you might need a pot for boiling, an electric steam sterilizer, microwave sterilizer, or chemical sterilizing solution. We’ll discuss these options in detail later.
Clean towels or paper towels: While air-drying is often preferred, having clean towels available for drying hands or wiping surfaces is helpful. Avoid using the same kitchen towels you use for dishes or other purposes.
In Dubai, these supplies are readily available at baby stores, pharmacies, and major retailers. Investing in quality supplies will make the bottle-cleaning process more efficient and effective.
Step-by-Step Guide to Washing Baby Bottles
Proper bottle washing involves more than just a quick rinse. Here’s the comprehensive process recommended by pediatric health experts, including the team at myPediaClinic:
Step 1: Rinse immediately after feeding
As soon as your baby finishes a bottle, rinse it with cool or lukewarm water. This prevents milk from drying and becoming much harder to clean later. You don’t need to do a full wash at this point, but a thorough rinse makes a significant difference. Disassemble all parts (bottle, nipple, ring, and any other components) and rinse each piece separately.
This step is particularly important in Dubai’s warm climate, where milk residue can develop bacterial growth very quickly in room-temperature bottles. Even if you’re exhausted after a nighttime feeding, taking 30 seconds to rinse can save you considerable scrubbing time later.
Step 2: Wash your hands
Before beginning the actual washing process, wash your hands thoroughly with soap and water for at least 20 seconds. This prevents transferring bacteria from your hands to the clean bottles.
Step 3: Disassemble all bottle parts
Take apart all components: the bottle itself, nipple, collar or ring, and any valves or vent inserts. Different bottle brands have different parts, so familiarize yourself with all the components of your specific bottles. Each piece needs to be cleaned separately to ensure thorough cleaning.
Step 4: Wash in hot, soapy water
Fill a clean basin or sink with hot water and add dish soap. (Using a basin dedicated to baby items is ideal, but a thoroughly cleaned kitchen sink is fine.) Wash each component thoroughly using the bottle brush to scrub the inside and outside of bottles, reaching all the way to the bottom. Use the nipple brush to clean inside nipples, scrubbing through the nipple hole from both sides to remove any milk residue. Don’t forget to clean the threads on the bottle and ring where milk can collect.
Dr. Yasmin Kottait at myPediaClinic notes that milk residue in hard-to-reach places can also contribute to unpleasant odors over time, so thorough cleaning of every crevice is important not just for hygiene but also for keeping equipment fresh.
Step 5: Rinse thoroughly
Rinse all components under running water, ensuring that all soap residue is completely removed. Soap left on bottle parts can cause digestive upset or affect the taste of the milk. Hold each piece under running water, checking carefully that no soap bubbles remain.
Step 6: Inspect for residue or damage
Hold each piece up to the light and inspect for any remaining milk residue, especially in nipple holes, bottle threads, or valve crevices. Also check for signs of wear, such as cracks in plastic, tears in nipples, or discoloration. Damaged bottle parts should be replaced immediately as they can harbor bacteria and may pose safety risks.
Step 7: Air-dry on a clean rack
Place all components on a clean drying rack in a location with good air circulation. Position bottles upside down and place nipples with the opening facing down to allow water to drain completely. Avoid using dish towels to dry bottle parts, as they can harbor bacteria and transfer it to your clean bottles.
In Dubai’s humid climate, especially during summer months, ensure your drying area has good ventilation. Some families use a fan to improve air circulation around drying bottles, which can speed the drying process and reduce the risk of bacterial growth on damp surfaces.
Step 8: Store properly
Once completely dry, reassemble bottles or store the parts in a clean, covered container or cabinet. Never store bottles or components while they’re still damp, as moisture promotes bacterial growth.
Sterilization: When, Why, and How
There’s often confusion about the difference between washing and sterilizing, and when each is necessary. Washing with hot, soapy water removes milk residue and most bacteria. Sterilization goes a step further, using heat or chemicals to kill virtually all bacteria and other microorganisms.
When sterilization is recommended:
Current guidelines from health organizations, including those followed at myPediaClinic Dubai, recommend sterilizing bottles, nipples, and other feeding equipment:
- Before first use (for new equipment)
- Daily for babies under 3 months old
- Daily for premature babies or babies with weakened immune systems (regardless of age)
- After illness
- If bottles haven’t been used for several days
For healthy babies over 3 months old, daily sterilization is generally not necessary if bottles are thoroughly washed after each use. However, many parents choose to sterilize once a day or a few times per week as an extra precaution, which is perfectly fine if it provides peace of mind.
Dr. Medhat Abu-Shaaban notes that while older guidelines recommended sterilizing bottles after every use, current evidence suggests this isn’t necessary for healthy babies in environments with safe water supplies, like Dubai. However, thorough washing after every use is absolutely essential.
Sterilization Methods:
Boiling: This is the most traditional and economical method. Place disassembled bottle parts in a large pot, completely submerge them in water, bring to a rolling boil, and boil for 5 minutes. Use tongs to remove the items (they’ll be very hot), and place them on a clean drying rack. Make sure items don’t touch the bottom or sides of the pot during boiling, as this can cause melting or warping, especially with plastic components.
Pros: No special equipment needed, effective, works for all bottle types
Cons: Time-consuming, must supervise the stove, can shorten the life of some bottles and nipples due to heat exposure
Electric steam sterilizer: These countertop appliances use steam to sterilize bottles and parts. Simply load the clean bottles and parts according to the manufacturer’s instructions, add the specified amount of water, and turn it on. The cycle typically takes 8-15 minutes, after which items remain sterile for several hours if you don’t open the sterilizer.
Pros: Quick, easy, efficient, keeps items sterile for hours, can sterilize multiple bottles at once
Cons: Requires counter space, initial purchase cost, another appliance to clean and maintain
Microwave steam sterilizer: Similar to electric sterilizers but designed for microwave use. Add water, load clean bottles and parts, and microwave according to instructions (typically 3-8 minutes depending on your microwave’s power).
Pros: Fast, no counter space needed (stores when not in use), more affordable than electric sterilizers
Cons: Requires a microwave, items are very hot immediately after the cycle, can only sterilize microwave-safe items
Chemical sterilization: Cold-water sterilizing solutions or tablets create a sterilizing solution that bottle parts are submerged in for a specified time (usually at least 30 minutes). The solution can be reused for 24 hours.
Pros: No heat required, can be used anywhere (useful for travel), good for items that can’t withstand heat
Cons: Chemical smell and taste (though rinsing helps), need to keep buying solution/tablets, requires a dedicated container, longer process time
Many Dubai families find electric steam sterilizers particularly convenient, given the frequency of bottle feeding and the availability of counter space in many homes. However, the best method is the one that fits your lifestyle and that you’ll use consistently.
Special Considerations for Different Bottle Materials
Baby bottles come in various materials, and each has specific care requirements:
Plastic bottles: Most common and lightweight. Check that they’re BPA-free (this is now standard but verify on older bottles). Plastic bottles can develop a cloudy appearance over time, especially if exposed to high heat repeatedly. Replace bottles if they become heavily scratched or discolored, as these imperfections can harbor bacteria.
Glass bottles: Excellent for parents concerned about chemicals, as glass doesn’t leach any substances. Glass can be sterilized repeatedly without degradation. The main drawback is that glass is heavier and can break if dropped. Use protective silicone sleeves to prevent breakage and make bottles easier to grip.
Silicone bottles: A newer option that’s flexible, durable, and chemical-free. Silicone can withstand repeated sterilization well and is less likely to harbor bacteria than plastic. However, silicone bottles typically cost more than plastic options.
Stainless steel bottles: Durable and long-lasting but can’t be used in microwave sterilizers. These are excellent for eco-conscious families but may require boiling or chemical sterilization methods.
At myPediaClinic, we advise parents to choose bottle materials based on their priorities (safety, durability, convenience, environmental impact) and their baby’s needs. Dr. Medhat Abu-Shaaban notes that from a health perspective, what matters most is proper and consistent cleaning rather than the specific material, assuming you’re using products designed for baby feeding.
Cleaning Bottles When Away from Home
Life with a baby often means feeding on the go, whether you’re shopping at Dubai Mall, visiting friends, or traveling. Here’s how to manage bottle cleaning when you’re not at home:
For short outings (a few hours): Bring pre-filled bottles in an insulated bag with ice packs. After feeding, rinse the bottle with bottled or tap water if available, or simply store it in a plastic bag until you get home. Wash thoroughly as soon as you return home.
For longer outings or day trips: Pack bottle-cleaning supplies in a portable kit: a small bottle of dish soap, a collapsible bottle brush, and a clean container or plastic bags for storing used bottles. If facilities are available, wash bottles as you would at home. If not, rinse well and wash properly when you return.
For travel: Consider using a microwave sterilizer (if you’ll have access to a microwave) or chemical sterilizing solution. Some parents prefer using pre-sterilized, disposable bottle liners for travel, which simplify cleaning considerably. Make sure your accommodation has adequate facilities for bottle washing, or research baby-friendly locations in advance.
Dubai’s many family-friendly facilities, including shopping malls with nursing rooms and family-oriented restaurants, often have facilities suitable for rinsing bottles. However, always plan ahead and bring the supplies you need rather than assuming facilities will be available.
Common Bottle Cleaning Mistakes to Avoid
Even well-meaning parents sometimes make bottle-cleaning errors that can compromise hygiene or damage equipment. Here are mistakes to avoid:
Not disassembling bottles completely: Milk can hide in the threads, under valve pieces, and in other small spaces. Always take bottles completely apart for washing.
Delaying washing: Letting bottles sit with milk residue for hours makes cleaning much harder and allows bacteria to multiply. Rinse immediately after feeding, even if you can’t do a full wash right away.
Using the same sponge for bottles and dishes: Kitchen sponges harbor huge amounts of bacteria. Use dedicated brushes for baby bottles that are replaced regularly.
Not cleaning brushes: Bottle brushes themselves need regular cleaning. Wash them in hot, soapy water, rinse well, and allow to dry completely between uses. Replace them every few months or when bristles become worn.
Drying with regular kitchen towels: Even clean-looking towels can harbor bacteria. Air-drying is safest.
Storing bottles while still damp: This promotes bacterial and mold growth. Ensure all parts are completely dry before storing.
Not checking expiration dates: Nipples and bottles don’t last forever. Check manufacturer recommendations and replace items showing wear or after the recommended lifespan.
Putting bottles in the dishwasher without checking: Not all bottles and nipples are dishwasher-safe. Heat and detergent in dishwashers can degrade some materials. Always verify that your specific bottles are dishwasher-safe and place them on the top rack if they are.
Dr. Yasmin Kottait and Dr. Medhat Abu-Shaaban at myPediaClinic remind parents that establishing good habits from the beginning makes proper bottle hygiene become second nature, requiring minimal thought or effort as part of your daily routine.
How Often Should You Replace Bottles and Nipples?
Even with excellent care, bottles and nipples don’t last forever. Here are guidelines for replacement:
Nipples: Replace every 2-3 months or sooner if you notice any tears, cracks, thinning, discoloration, or change in milk flow. Nipples take the most wear and should be inspected before each use.
Bottles: Replace plastic bottles every 4-6 months or when they show signs of wear such as cracks, chips, scratches, cloudiness, or discoloration. Glass and stainless steel bottles can last much longer if they remain undamaged.
Bottle brushes: Replace every 2-3 months or when bristles become splayed or worn.
Always replace any component immediately if it shows damage, regardless of how long you’ve had it. The small cost of replacement is insignificant compared to your baby’s health and safety.
Special Considerations for Dubai’s Climate and Water
Dubai’s environment presents some unique considerations for bottle cleaning:
Water quality: Dubai’s tap water is safe and meets international standards, making it suitable for washing bottles. However, some families prefer using filtered water for washing bottles, which is fine but not necessary from a safety perspective.
Heat and humidity: Dubai’s climate means bacteria can multiply quickly in milk residue. This makes prompt rinsing after feeding even more important. Ensure your bottle-drying area has good ventilation, as humidity can slow drying and promote bacterial growth.
Air conditioning: While air conditioning helps keep homes cool, it can also create condensation in some areas. Make sure your bottle-drying rack is in a location that stays dry and has good air circulation, away from AC vents that might cause condensation.
Hard water: Some areas of Dubai have harder water, which can leave mineral deposits on bottles over time. If you notice white residue building up, you can periodically soak bottles in a solution of equal parts white vinegar and water, then wash and rinse thoroughly.
Frequently Asked Questions About Cleaning Baby Bottles
Can I put baby bottles in the dishwasher?
Many modern baby bottles and nipples are dishwasher-safe, but you must verify this for your specific products. Check the packaging or manufacturer’s website for guidance. If dishwasher-safe, always place bottles on the top rack and use a mesh bag or dishwasher basket for small parts like nipples and rings to prevent them from falling to the bottom and melting. Use a hot water cycle and heat-dry if available. However, even with dishwasher-safe bottles, some pediatricians at myPediaClinic recommend hand-washing as the primary method, as it allows you to visually confirm each piece is thoroughly cleaned and inspect for damage during the washing process.
How many bottles do I need to have on hand?
This depends on your feeding frequency and how often you want to wash bottles. Most parents find that having 8-12 bottles works well for a newborn, allowing you to wash bottles once or twice a day rather than after every single feeding. As your baby gets older and feeds less frequently, you may need fewer bottles. Having enough bottles to get through a full day (and night) without washing allows you to establish a routine of washing all bottles together, which many parents find more efficient than washing throughout the day. Dr. Medhat Abu-Shaaban at myPediaClinic suggests that having adequate bottles on hand reduces stress and ensures you always have clean bottles available, even during particularly busy or exhausting days.
Do I really need to sterilize bottles, or is washing enough?
For healthy, full-term babies over 3 months old, thorough washing with hot, soapy water after every use is generally sufficient if you have access to safe water, as we do in Dubai. However, sterilization is important before first use of new bottles, for babies under 3 months, for premature babies, for babies with compromised immune systems, and after illness. Many parents continue to sterilize occasionally even after their baby is past the 3-month mark, and this extra precaution is perfectly fine. The most important thing is consistent, thorough washing after every use, regardless of whether you sterilize. If you’re uncertain about your specific situation, consult with Dr. Medhat Abu-Shaaban at myPediaClinic for personalized guidance.
What’s the best way to dry baby bottles?
Air-drying on a clean drying rack specifically designated for baby bottles is the safest method. Position bottles and components so water can drain completely, typically with openings facing downward. Ensure good air circulation around the drying rack to speed drying and prevent bacterial growth. Avoid using dish towels to dry bottles, as towels can harbor bacteria even when they appear clean. If you must dry bottles manually (for example, if you need to use them immediately), use clean paper towels. Never store bottles while they’re still damp. In Dubai’s humid environment, you might find that placing the drying rack in an air-conditioned room or near a fan helps bottles dry faster and more thoroughly.
Can I use regular dish soap to wash baby bottles?
Yes, regular dish soap is fine for washing baby bottles, as long as you rinse very thoroughly to remove all soap residue. Some parents prefer baby-specific bottle soaps, which are typically fragrance-free and formulated to be gentle, but they’re not necessary from a health perspective. Whether you use regular dish soap or baby bottle soap, the key is thorough rinsing. Look for fragrance-free options to avoid potential irritation and to ensure your baby’s milk doesn’t pick up any soapy taste or smell. At myPediaClinic, we recommend avoiding antibacterial soaps for bottle washing, as regular soap and thorough washing is sufficient, and antibacterial additives aren’t necessary for proper cleaning.
How long can a washed bottle sit before it needs to be washed again?
If a bottle has been thoroughly washed, completely dried, and stored in a clean, covered location, it can sit indefinitely without needing to be re-washed. However, if bottles have been sitting unused for several days or more, many parents choose to rinse or re-wash them before use, which is a reasonable precaution. If you’ve assembled a bottle (especially with formula or breast milk) but your baby didn’t drink from it, you can refrigerate it for the time specified for that type of milk, but once your baby has drunk from a bottle, any remaining milk should be discarded within 1-2 hours, and the bottle should be washed before reuse.
What should I do if my baby bottles start to smell even after washing?
Odors developing in baby bottles usually indicate that milk residue is building up in areas you’re not reaching during washing, or that plastic bottles are beginning to degrade. First, ensure you’re completely disassembling bottles and cleaning all components, including threads, valve pieces, and nipple interiors. Soak bottles in warm water with a small amount of white vinegar (equal parts vinegar and water) for 15-30 minutes, then wash thoroughly and rinse very well. For persistent odors, create a paste of baking soda and water, scrub the inside of the bottle with this paste using your bottle brush, then rinse thoroughly. If odors persist despite these efforts, it’s time to replace the bottles, as the plastic may have degraded and developed microscopic cracks that harbor bacteria. Dr. Yasmin Kottait at myPediaClinic notes that while odors don’t always indicate a safety issue, they do suggest it’s time for new bottles.
Is it safe to reuse bottles from an older child or accept hand-me-down bottles?
This depends on the condition and age of the bottles. If bottles are BPA-free, in excellent condition with no scratches, cracks, or cloudiness, and are relatively new (within the past year or two), they can be safe to reuse. However, you should replace all nipples, as these degrade relatively quickly and can’t safely be reused. Before using any hand-me-down bottles, sterilize them thoroughly. That said, bottles are relatively inexpensive, and starting fresh ensures you have the latest safety features and materials. At myPediaClinic, we generally recommend buying new bottles and nipples for each new baby if financially feasible, as bottle technology and safety standards continue to improve, and the peace of mind is worth the modest investment.
Can I clean bottles with just hot water, without soap?
While hot water alone can remove some milk residue, it’s not sufficient for proper cleaning. Milk contains fats that require soap to break down and remove completely. Without soap, invisible milk fat residue can remain on bottle surfaces, providing an ideal environment for bacterial growth. Always use dish soap (or baby bottle soap) in addition to hot water. However, after washing with soap and water, thorough rinsing with hot water is essential to remove all soap residue. Dr. Medhat Abu-Shaaban emphasizes that proper washing technique—including soap, scrubbing with a brush, and thorough rinsing—is more important than any single element of the process.
How can I tell when a bottle nipple needs to be replaced?
Inspect nipples regularly for signs of wear or damage. Replace immediately if you notice any tears or cracks (even tiny ones), thinning of the silicone or latex, changes in color (yellowing or darkening), changes in texture (becoming sticky or rough), or changes in milk flow (faster or slower than it should be for that nipple stage). To check for hidden tears, fill the nipple with water, hold it upside down, and squeeze—if water sprays out from anywhere other than the intended holes, the nipple is damaged. As a general guideline, plan to replace nipples every 2-3 months even if they appear fine, as materials degrade over time with washing and sterilization. Many parents mark new nipples with the date they were first used to track age.
Should I wash bottles immediately after feeding or can I let them soak?
The ideal is to at least rinse bottles immediately after feeding, even if you can’t do a full wash right away. Immediate rinsing prevents milk from drying and becoming much harder to remove later. If you’re collecting bottles to wash all at once (which many parents find more efficient), rinse each bottle thoroughly immediately after use, then store them in a clean basin until you’re ready to wash. You can fill the basin with soapy water and let the bottles soak if you’d like, though this isn’t necessary if you’ve rinsed well. Avoid letting unrinsed bottles sit for hours, especially in Dubai’s warm climate, as this allows bacteria to multiply rapidly. Full washing should happen at least once or twice daily so bottles are never sitting for extended periods.
Can hard water damage baby bottles or affect my baby?
Hard water (water with high mineral content) won’t harm your baby, but it can leave mineral deposits on bottles, creating a cloudy or spotty appearance. These deposits are harmless but can look unpleasant and, if they build up significantly, might create rough surfaces where bacteria could potentially hide. To prevent buildup, periodically soak bottles in a solution of equal parts white vinegar and water for 15-30 minutes, then wash and rinse thoroughly. This dissolves mineral deposits and restores clarity to bottles. Dubai’s water hardness varies by area, so some families may notice this more than others. If you’re concerned about water quality for making formula, consult with Dr. Medhat Abu-Shaaban about whether filtered or bottled water might be appropriate for your situation.
Is it necessary to have a separate drying rack for baby bottles?
While not absolutely necessary, having a drying rack dedicated solely to baby feeding equipment is strongly recommended. Regular dish drying racks may harbor bacteria from dish washing and food preparation. A dedicated baby bottle rack ensures that clean bottles aren’t exposed to potential contamination from other items. Baby bottle racks are also designed specifically for bottles, nipples, and other feeding equipment, keeping items properly positioned for drainage and preventing small parts from falling through or getting lost. Many designs allow nipples to dry on pegs, inverted to allow water drainage, which standard racks don’t accommodate. Given the relatively low cost of baby bottle drying racks, this is a worthwhile investment for most families.
Can I prepare bottles in advance and refrigerate them?
Yes, you can prepare bottles in advance, but follow proper guidelines for storage duration and temperature. Bottles with breast milk can be refrigerated for up to 4 days. Bottles with prepared formula should be used within 24 hours if refrigerated immediately after preparation, though the FDA recommends using prepared formula within 2 hours if possible. Always store prepared bottles in the back of the refrigerator where temperature is most consistent, not in the door. Label bottles with preparation date and time. Before feeding, warm the bottle under warm running water or in a bottle warmer, never in the microwave (which creates hot spots). Any milk remaining after feeding should be discarded within 1-2 hours, and the bottle should be washed before refilling. While preparing bottles in advance can be convenient, especially for nighttime feedings, freshly prepared bottles are generally preferred when practical.
What’s the best temperature water for washing baby bottles?
Hot water is most effective for washing baby bottles—as hot as you can comfortably handle. Hot water helps dissolve milk fats more effectively than cold or lukewarm water and provides some antibacterial effect, though it’s the combination of hot water, soap, and mechanical scrubbing that actually achieves proper cleaning. Some experts recommend water around 120-140°F (49-60°C). However, for rinsing after washing, any temperature is fine as long as you rinse thoroughly. Be sure your hands can tolerate the water temperature—if it’s too hot for your hands, you won’t be able to wash effectively. When sterilizing by boiling, water must reach a full rolling boil (212°F/100°C at sea level) and maintain that temperature for at least 5 minutes to be effective.
Should bottles smell like anything after washing?
No, properly cleaned bottles should have no odor at all. If bottles smell like milk even after washing, milk residue remains and needs to be cleaned more thoroughly. If bottles smell like plastic (especially new bottles), this is typically harmless and fades with use and washing, though you can soak new bottles in baking soda and water before first use to reduce plastic smell. If bottles develop a sour or unpleasant smell even after thorough washing, this indicates bacterial growth or plastic degradation, and the bottles should be replaced. Bottles shouldn’t smell like soap either—if they do, you’re not rinsing thoroughly enough. Any persistent unusual odors warrant replacing the bottles, as smell can indicate microscopic cracks or degradation that can’t be properly cleaned.
Can I use bleach to clean baby bottles?
Bleach can be used for sanitizing baby bottles, but only when properly diluted and when other methods aren’t available. The CDC provides guidelines for using bleach solution for baby feeding items: use 2 teaspoons of unscented bleach per gallon of water, soak all items completely for at least 2 minutes, then air-dry without rinsing (the bleach will break down as items dry). However, this method is typically recommended only in situations where you don’t have access to safe water for washing or to a safe heat source for sterilization. For families in Dubai with access to safe water and sterilization equipment, bleach sanitization isn’t necessary and regular washing with soap and water is preferred. Never use bleach in regular washing, only for occasional sanitization if recommended by your pediatrician.
How should I clean bottle accessories like formula dispensers or sippy cup parts?
Clean all feeding accessories—formula dispensers, sippy cups, straw cups, bottle warmers, and any other items that contact milk or food—with the same care as bottles. Disassemble completely, wash in hot soapy water with appropriate brushes to reach all surfaces, rinse thoroughly, and air-dry on a clean rack. Formula dispensers in particular need careful cleaning, as powdered formula can cake in corners. Many accessories are dishwasher-safe (check manufacturer guidelines), which can make cleaning easier. Sterilize accessories before first use and periodically thereafter, especially for babies under 3 months. At myPediaClinic, Dr. Medhat Abu-Shaaban reminds parents that any item that goes in your baby’s mouth or contacts their food needs the same level of hygiene attention as bottles themselves.
Establishing a Bottle-Cleaning Routine That Works
The key to maintaining proper bottle hygiene without feeling overwhelmed is establishing a routine that fits your lifestyle. Here are approaches that work for different family situations:
The “wash as you go” approach: Wash each bottle immediately after use. This works well for parents who prefer to keep tasks from accumulating and who don’t mind washing bottles several times throughout the day.
The “batch wash” approach: Rinse bottles after each use, then wash all bottles together 1-2 times daily. This is more efficient for many parents and works well if you have enough bottles to get through the day between washing sessions.
The “combination” approach: Wash some bottles immediately (particularly those used for nighttime feedings when you’re up anyway) and batch-wash others at set times during the day.
Choose the approach that feels most sustainable for your family. The best system is the one you’ll maintain consistently. Whatever routine you establish, remain flexible—newborn days are exhausting, and as long as bottles are being properly cleaned within a reasonable timeframe, you’re doing fine.
Working with myPediaClinic for Your Baby’s Health
While bottle cleaning is a routine part of infant care, the pediatric team at myPediaClinic in Dubai is always available to address any concerns or questions you might have. If your baby experiences frequent digestive issues, Dr. Medhat Abu-Shaaban can help determine whether bottle hygiene might be a factor or whether other causes need to be investigated.
Our team can provide personalized guidance on feeding practices, including bottle selection, feeding schedules, and transitioning from bottles to cups. Dr. Yasmin Kottait can address any dental concerns related to bottle use and help you understand how to protect your baby’s developing teeth.
We understand that new parents in Dubai face unique challenges, from navigating the hot climate to managing busy lifestyles. At myPediaClinic, we’re committed to providing practical, evidence-based advice that supports your family’s health and well-being.
Conclusion: Clean Bottles, Healthy Baby
Proper bottle cleaning is one of the most important ways you protect your baby’s health during the first year of life. While the process might seem time-consuming at first, it quickly becomes routine, requiring minimal thought or effort as part of your daily schedule.
Remember the key principles: rinse immediately after feeding, disassemble completely, wash thoroughly with hot soapy water and proper brushes, rinse well, air-dry on a clean rack, and sterilize when appropriate for your baby’s age and health status. Following these guidelines will ensure your baby’s bottles are clean, safe, and ready for each feeding.
If you have any concerns about bottle hygiene, your baby’s feeding patterns, or any aspect of infant care, don’t hesitate to reach out to myPediaClinic. Schedule an appointment with Dr. Medhat Abu-Shaaban or one of our other pediatric specialists for expert, personalized guidance.
Contact myPediaClinic Dubai today for comprehensive pediatric care that supports your family every step of the way. Because when it comes to your baby’s health, you deserve expert support and peace of mind.